

What Are the Best Commercial Plumbing Leak Repair Solutions?
Last Updated: October 30, 2026
Quick Summary
The best commercial plumbing leak repair solutions start with non-invasive detection, such as acoustic listening, thermal imaging and pressure isolation testing, to locate the source before any wall, slab or ceiling is opened. Once confirmed, choose a patch, section replacement or reline based on pipe material and the condition of the surrounding run, then pressure-test and document the repair.
- Schedule acoustic detection outside operating hours, because plant room, lift and traffic noise masks the leak signal.
- Ask whether the failure is isolated or part of a pattern before committing to a patch or section replacement.
- Follow the eight-step workflow: isolate, confirm, expose, assess, select, repair, pressure test, then restore and document.
- Plan shutdowns around how the building actually runs, and notify tenants and the building manager in writing.
- Budget detection, access, repair, reinstatement and testing as separate line items, not just the repair itself.
Table of Contents
- Commercial Plumbing Leak Detection: Finding the Source Before You Cut
- Commercial Plumbing Repair or Replacement: Choosing the Right Path
- A Step-by-Step Commercial Leak Repair Workflow
- Business Continuity and Damage Mitigation During Repairs
- Commercial Plumbing Leak Prevention: Reducing Recurring Failures
- Your Commercial Plumbing Maintenance Checklist
- Post-Repair Testing, Documentation and Budgeting
- Planning Your Next Repair: Selecting Fittings and Getting Trade Pricing
- Frequently Asked Questions
Commercial Plumbing Leak Detection: Finding the Source Before You Cut
A commercial plumbing leak rarely announces itself politely. It shows up as a damp patch on a tenancy ceiling, a water bill that climbs without explanation, or a subfloor that smells wrong. The pattern is consistent: the repair is rarely the hard part.
Non-invasive methods should always come first. Opening a wall to "have a look" is a guess dressed up as a plan.
Non-invasive methods and tools
Modern detection relies on instruments rather than intuition. Common approaches include:
- Acoustic listening: microphones pick up the sound of pressurised water escaping a pipe.
- Thermal imaging: temperature differences reveal moisture paths behind surfaces.
- Moisture meters: confirm the extent of saturation without cutting.
Watch out: acoustic detection on a busy site during peak hours is close to useless. Ambient noise from plant rooms, lifts and traffic masks the leak signal, so schedule detection outside operating hours where possible.
Commercial Plumbing Repair or Replacement: Choosing the Right Path
Repair is often appropriate when the leak is localised, the pipe material is sound, and access is reasonable. Replacement wins when the failure is systemic: repeated pinholes along a run, a material at the end of its service life, or corrosion that has thinned walls across a whole section.
A useful test is to ask three questions before committing: Is the failure isolated or part of a pattern? Is the surrounding pipe wall still within its serviceable thickness? And can the repair be completed and tested without opening more of the building than the detection results justify? If any answer is uncertain, scope the work as a section replacement rather than a patch.
Repair methods by pipe material and leak location
| Pipe material | Typical leak | Preferred repair approach | Access and verification notes |
|---|---|---|---|
| Copper | Pinholes, joint failure | Cut out and replace section; press-fit or brazed joint | Assess whether pinholes are isolated or systemic; pressure-test the repaired section before closing in |
| Stainless steel | Joint or mechanical damage | Section replacement with compatible press fittings | Match the profile and material of the existing system; confirm the fitting range and installation requirements before work |
| PVC / uPVC drainage | Cracked pipe, failed solvent joint | Section cut-out with slip coupling or new joint | Confirm bedding and support before backfill; CCTV or flow-test the repaired line |
| Cast iron drainage | Corrosion, joint deterioration | Section replacement or mechanical coupling | Check remaining wall thickness along the run; verify support after replacement |
| PEX | Fitting failure, kink damage | Replace fitting or section | Confirm the system's approved fitting range; pressure-test after repair |
For stainless steel work, contractors should confirm the system's application details and suitability for the pipe and location before committing. Where the existing system uses a different press profile, confirm compatibility before mixing components; do not assume interchangeability.
Where a leak sits mid-run and there is no room to spring the pipe, a slip coupling does the job. Valtech's range runs from the 316L stainless steel slip coupling 15 at $5.48 through to the slip coupling 108 at $118.25. For a straight join between two fixed ends, an equal coupling 22 at $3.69 covers the common mid-size case.


Choosing between a patch, a section replacement and a reline
A patch or clamp is appropriate only where the pipe wall around the defect is sound and the leak is a single, well-defined point. A section replacement is the safer default where the defect sits near a joint, where the pipe has lost wall thickness, or where movement or support issues caused the failure. Relining is a drainage option rather than a pressure-pipe option; it suits cracked or root-damaged buried drains where excavation is impractical, but it requires the line to be cleared and surveyed first.
Access, isolation and reinstatement
Repair method and access strategy should be chosen together. A repair that requires opening a tenancy ceiling may be less disruptive overnight than during trading hours, even if the method itself is slower. Plan the isolation zone, confirm what else the zone serves, and agree the reinstatement scope before work starts. Reinstatement, patching, painting, ceiling replacement, is part of the job and should be quoted as such.
A Step-by-Step Commercial Leak Repair Workflow
A structured workflow keeps the job controlled and the paperwork clean. The sequence below suits most commercial plumbing leak repairs, from a tenancy riser to a plant room main.
- Isolate and make safe. Shut the affected zone, tag it out, and control the water.
- Confirm the source. Use detection methods to pin the leak to a specific location.
- Expose with purpose. Open only what the detection results justify.
- Assess the pipe condition. Check surrounding material, not just the failure point.
- Select the repair method. Match fittings and technique to material and location.
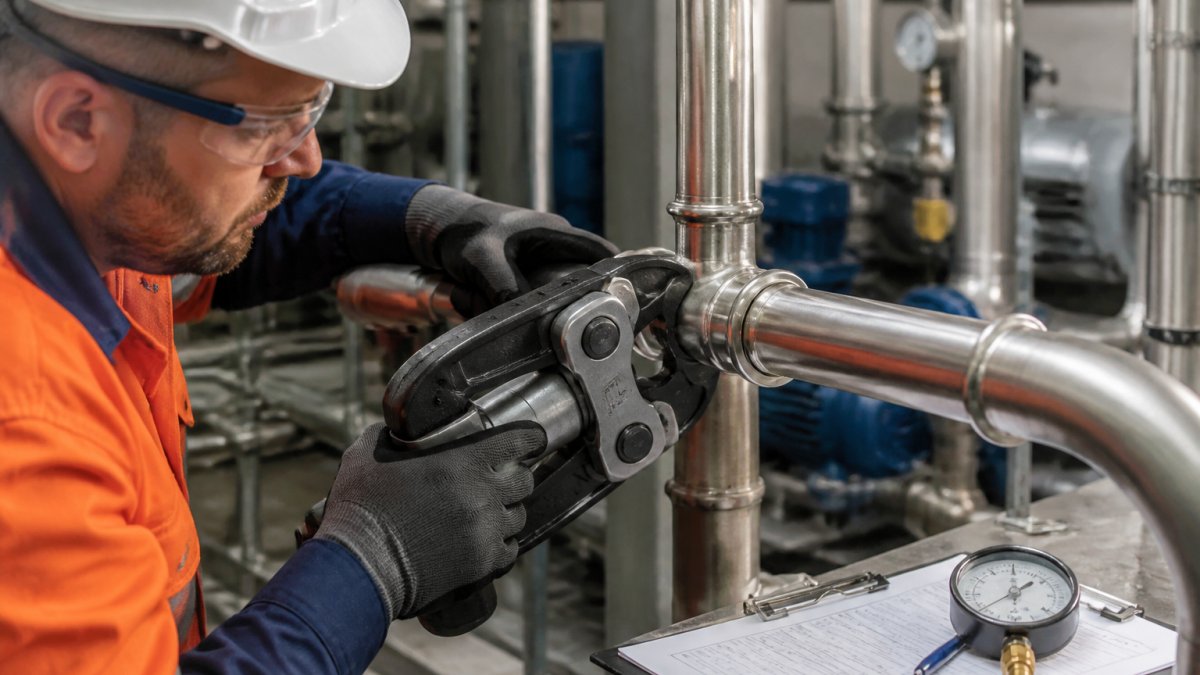
- Complete the repair. Install to the manufacturer's requirements and system limits.
- Pressure test. Verify the repair before closing up.
- Restore and document. Reinstate finishes and record what was done.
A common mistake is skipping step four. A repair that ignores a corroding run behind it will be back within months.
Business Continuity and Damage Mitigation During Repairs
Water damage escalates fast in a commercial building. The priority order is: stop the water, protect critical assets, then repair. Tenants need notice, and any fire or electrical services near the leak need isolating before work begins.
Shutdown planning around the building's operating pattern
Plan the shutdown around how the building actually runs. A retail tenancy may only tolerate an overnight isolation; a warehouse may allow a daytime window; a multi-tenancy office may need a staged isolation so that no floor loses water for longer than necessary. Map the isolation zone first, confirm which tenancies, plant items and fire services the zone serves, then agree the window with the building manager and affected tenants in writing.
316L Stainless Steel Slip Coupling 15 →
A practical sequence is:
- Confirm the isolation boundary and test that the zone is actually isolated before opening anything.
- Notify affected tenants and the building manager with the start time, expected duration and any services that will be unavailable.
- Protect critical assets, plant, switchboards, lifts, IT equipment and stored goods, with covers, bunding or relocation before water is released.
- Control the water at the source and begin extraction and drying immediately rather than after the repair.
- Record the isolation, the make-safe and the drying with photographs and timestamps.
Tenant communication and access
Tenants tolerate disruption far better when they know what is happening and when it will end. A short written notice covering the isolation window, the reason, the areas affected and a contact name is usually enough. Where access to a tenancy is required, agree it in advance and record who attended and when. For buildings with after-hours operations, confirm whether the isolation affects fire services or emergency lighting and coordinate with the relevant contractor.
Protecting assets and documenting for insurers
Document the isolation, the make-safe and the drying as separate records. Photograph the leak location before work, the isolation point, any water-affected assets and the drying equipment in place. Keep a drying log with readings and dates. Repair decisions made without that record often complicate claims later, and a clear record also supports any warranty discussion about the repair itself.
Reducing operational disruption
Where the repair can be staged, stage it. A temporary isolation that restores most of the building while the permanent repair is scheduled causes less disruption than a single long shutdown. Confirm with the building manager whether temporary supply arrangements are acceptable and record any temporary measures so they are removed or replaced as part of the permanent repair.
Commercial Plumbing Leak Prevention: Reducing Recurring Failures
Repeat leaks usually share a root cause: aggressive water chemistry, poor support and bedding, thermal movement, or a material mismatched to its environment.
A stainless steel pipe system maintenance guide helps contractors build a prevention regime rather than reacting to each failure. Where corrosion is the suspected driver, how to prevent plumbing corrosion issues covers the practical controls worth putting in place.
Your Commercial Plumbing Maintenance Checklist
- Pressure-test zones on a scheduled basis and log the results
- Inspect plant rooms and risers for staining, damp or mineral deposits
- Confirm backflow prevention devices are tested to schedule (Backflow prevention and on-site sewage facilities)
The checklist is only useful if it is actually run. Assign ownership to a named person, not "the maintenance team".
Post-Repair Testing, Documentation and Budgeting
No repair is complete until it has been pressure-tested and documented. Test the repaired section at the system's working pressure, hold it, and record the result. Photograph the repair before it is closed in.
Documentation should capture the leak location, detection method, repair method, fittings used, test result and date. That record feeds future maintenance planning and supports any warranty or insurance discussion.
Planning Your Next Repair: Selecting Fittings and Getting Trade Pricing
Fitting selection should follow the pipe material, the profile of the existing system and the access available at the leak.
Contractors buying regularly can register for a trade account to access pricing. For a specific job, contact Valtech for pricing and technical support on the fittings required.
A commercial plumbing leak is a disruption problem as much as a repair problem.
Frequently Asked Questions
How do you find a leak in a commercial plumbing system?
Start by isolating the affected zone using isolation valves and sub-meters, then confirm the loss with a pressure test. Non-invasive methods such as acoustic listening, thermal imaging and tracer gas help pinpoint hidden leaks in walls, slabs and underground runs without large-scale demolition. Accurate detection before cutting saves both repair time and building damage, and it gives the facility manager a clear record of where the fault sits before any work begins.
How do plumbers decide whether to repair or replace a leaking pipe?
The decision usually turns on leak location, pipe condition and how much of the run is affected. A single isolated pinhole in otherwise sound pipe can often be repaired with a coupling or a short section replacement. Widespread corrosion, repeated failures on the same line, or a leak under a slab may justify replacing the full run. Assess the pipe material, the water chemistry and the cost of access before committing, because a cheap repair in a failing line often recurs.
Can press-fit pipe and fittings be used for commercial plumbing repairs?
Press-fit systems are commonly used for commercial repairs because they join pipe quickly without hot works, which suits occupied buildings and confined plant rooms. Valtech Australia supplies 316L stainless steel press-fit pipe and fittings in the M press profile, WaterMark certified under WM 75254, with a 25-year product warranty subject to the warranty terms, correct installation and appropriate application. Confirm the applicable model in the current certificate schedule and check that the water chemistry suits stainless steel before specifying it.
What should be checked before selecting stainless steel pipe for a repair?
Check the water chemistry first, particularly chlorine and chloride exposure, because stainless steel is not suitable for every water supply or environment. Confirm the pipe size and the press profile match the tooling on site, and verify the WaterMark documentation covers the fittings you intend to use. Also assess access, support requirements and whether the surrounding pipe is compatible. Where water quality is uncertain, have the conditions assessed and follow Valtech's technical requirements before ordering.
