

How to Prevent Plumbing Corrosion Issues: 7-Step Guide
Table of Contents
- Step 1: Understand What Drives Corrosion in a Plumbing System
- Step 2: Identify the Causes of Pipe Corrosion Before They Spread
- Step 3: Read the Signs of Corrosion in Water Pipes Early
- Step 4: Test Water Quality and Plumbing Corrosion Risk Together
- Step 5: Choose Corrosion-Resistant Plumbing Materials That Suit the Job
- Step 6: Install and Protect the System to Reduce Corrosion
- Step 7: Maintain, Inspect and Monitor for Long-Term Protection
- When to Call a Licensed Plumber or Water-Quality Professional
- Frequently Asked Questions
Last Updated: October 18, 2026
Step 1: Understand What Drives Corrosion in a Plumbing System
Plumbing corrosion is the gradual breakdown of pipe metal through reaction with water, oxygen and dissolved minerals, thinning the wall until joints and fittings leak.
Three conditions drive most of it: aggressive water chemistry, dissimilar metal contact and trapped moisture. Remove any one and the corrosion rate drops sharply.
An early failure usually had two or three contributing factors, which is why replacing the failed section without fixing the cause tends to repeat the outcome.
Step 2: Identify the Causes of Pipe Corrosion Before They Spread
The causes of pipe corrosion fall into two groups: what the water does to the metal, and what the installation does to it.
Water chemistry, dissolved oxygen and disinfectants
Water quality and plumbing corrosion are tightly linked. Low pH attacks metal directly, high dissolved oxygen feeds oxidation, and residual disinfectants add an oxidising load that some metals handle better than others.
Alkalinity and hardness also matter: unbalanced water can scale the pipe interior or leave it exposed and vulnerable.
Galvanic, crevice and pitting corrosion explained
- Galvanic corrosion happens when two different metals touch in the presence of an electrolyte, such as water. The less noble metal gives way.
- Crevice corrosion starts in tight gaps where water sits stagnant, under a gasket or a poorly seated fitting.
- Pitting corrosion is localised and bores into the wall, often with little visible warning on the outside.
Material compatibility at joints is where galvanic risk concentrates. Mixing metals without an appropriate transition is a common mistake.
Step 3: Read the Signs of Corrosion in Water Pipes Early
The signs of corrosion in water pipes usually appear before a leak does. Catching them early is the difference between a repair and a replacement.
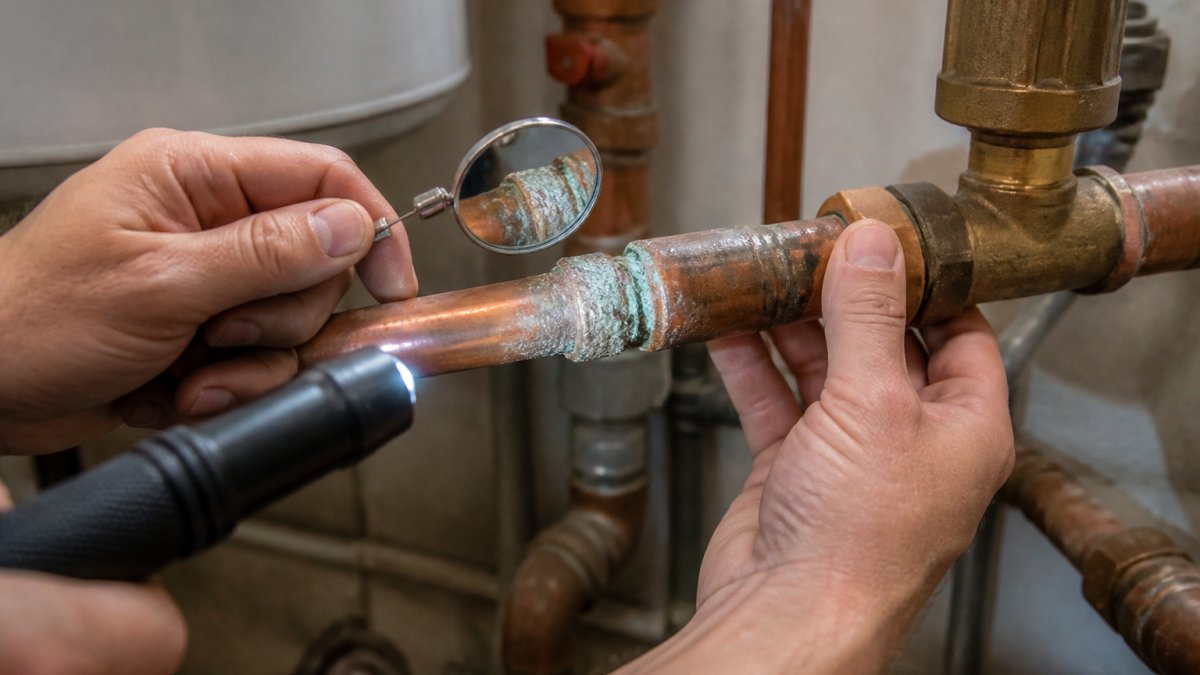
Watch for:
- Green corrosion products on copper, or white crust on other metals
- Discoloured water at first draw, especially after stagnation
- Staining around joints and fittings
Discolouration and staining are early warnings. Metal leaching into the water supply is a drinking water concern, so investigate any change in water appearance.
Step 4: Test Water Quality and Plumbing Corrosion Risk Together
Testing water alone misses half the picture. Test the water and inspect the system together, because the same water can be benign in one installation and aggressive in another depending on temperature, flow, stagnation and joint materials.
A practical sampling protocol
A useful testing protocol for a domestic or commercial building:
- First-flush sample. Draw a sample first thing in the morning, or after a known period of stagnation (typically six hours or more), before any tap in the line has been used. This captures what has been sitting in contact with the pipe wall.
- Flushed sample. Run the line for two to three minutes and draw a second sample. This captures the incoming supply chemistry rather than the pipe's contribution.
- Compare the two. A first-flush sample that is discoloured, cloudy or has elevated metals compared with the flushed sample points to the pipework, not the supply.
- Record the basics. pH, alkalinity, hardness, disinfectant residual (free chlorine or chloramine), chloride and, where relevant, dissolved oxygen. For suspected metal leaching, request iron, copper, lead, nickel and zinc.
- Note the system. Record pipe materials, joint types, recent repairs, dead legs and sections with known leaks or staining. A lab result without this context is hard to act on.
Where a laboratory is used, confirm it is accredited for the tests requested and follow its sample bottle, holding time and preservation instructions, as unaccredited kits or poorly collected samples can mislead.
Interpreting the results
Interpret results by looking for combinations, not single readings:
- Low pH with low alkalinity indicates water aggressive to metal. It attacks the pipe wall directly and offers little buffering against pH swings.
- Elevated chloride with moderate pH can still drive pitting in susceptible stainless steels and crevice attack in copper, particularly where water stagnates or concentrates under gaskets and seals.
- High hardness with high alkalinity tends to scale rather than corrode. Scale is not harmless, it narrows bore, shelters bacteria and can hide pitting underneath, but it behaves differently from metal loss.
Water that is aggressive on paper may cause few problems in a well-installed, compatible system, while water that looks fine can still pit a pipe where chlorides concentrate in a crevice. Where chlorine or chloride exposure is a concern, application conditions should be assessed and the manufacturer's technical requirements followed.
Distinguishing corrosion from scale, staining and condensation
Before treating a mark as corrosion, rule out the alternatives:
316L Stainless Steel Pipe 15 x 1.0 x 5800 →
- Mineral scale is usually white, chalky or crusty, builds up at joints and tapware, and dissolves with a mild acid. It sits on the surface rather than eating into it.
- Staining, green on copper, white on galvanised, can be an early corrosion product or simply a surface deposit. Probe gently: if the metal underneath is sound, it is surface staining; if it is pitted or thin, it is corrosion.
- External condensation appears as beads of moisture on the outside of a cold line, often in humid or poorly ventilated spaces. It is a moisture problem, not a water-chemistry problem, fixed with insulation and ventilation rather than treatment.
Step 5: Choose Corrosion-Resistant Plumbing Materials That Suit the Job
No single material suits every job. The right choice depends on water chemistry, environment, joint method and expected service life.
| Material | Common use | Watch for |
|---|---|---|
| Copper | Potable and heating lines | Green corrosion products, pitting in aggressive water |
| Galvanised steel | Older systems | Internal scale and wall thinning |
| PVC and PEX | Cold and some hot lines | Temperature and UV limits |
| 316L stainless steel | Potable and commercial lines | Suitability depends on water chemistry |
Stainless steel is not automatically right for every water chemistry or environment. Chloride levels and local conditions affect suitability, so assess the application and follow the supplier's technical requirements.
For projects where corrosion resistance and joint integrity both matter, Valtech Australia supplies 316L stainless steel press-fit pipe and fittings. Sizes include 316L Stainless Steel Pipe 15 x 1.0 x 5800, 316L Stainless Steel Pipe 22 x 1.2 x 5800, 316L Stainless Steel Pipe 28 x 1.2 x 5800, and 316L Stainless Steel Pipe 35 x 1.5 x 5800.

Material compatibility at joints and fittings
Compatibility is where most preventable failures begin. Keep dissimilar metals apart, or use an appropriate transition. Match fittings to the pipe system they were made for. Avoid mixing press profiles or brands within a single joint.
Step 6: Install and Protect the System to Reduce Corrosion
Installation quality decides how long a sound material lasts, and the prevention steps differ by material.
Copper
- Keep copper away from direct contact with galvanised steel, aluminium and other dissimilar metals unless an appropriate dielectric transition is used, as galvanic attack at the joint is a common cause of early failure.
- Support the line so it does not vibrate or stress at soldered joints; movement cracks the joint and creates a crevice for corrosion.
- Avoid excessive flux residue, which is aggressive and promotes pitting at the joint.
Galvanised steel
- Galvanised systems are most at risk where the zinc coating is damaged during cutting, threading or handling. Touch up cut ends and threads with an approved protective coating where the product allows.
- Avoid mixing galvanised with copper downstream. Dissolved copper can plate onto the galvanised surface and accelerate failure.
- Expect internal scale over time. Plan for reduced bore and monitor flow rather than waiting for a blockage.
PVC and PEX
- These materials do not corrode in the metallic sense, but they are sensitive to temperature, UV and chemical exposure. Keep them within the manufacturer's temperature and pressure limits and protect exposed runs from sunlight.
- Use the correct fittings and insert stiffeners for the specific product. Mismatched fittings are a common source of leaks and joint failure.
- PEX and some plastics can be affected by high chlorine or chloramine levels over long service life. Confirm suitability with the manufacturer for the water chemistry in the application.
316L stainless steel press-fit
- Press-fit removes hot works, which helps in confined spaces, occupied buildings and areas where a fire watch would otherwise be required, and produces a consistent joint that depends less on operator technique.
- Use the correct press tool and jaw for the M press profile, confirm the tool is calibrated and the jaw is the right size, and keep the pipe end clean, cut square and deburred. An incomplete press is the most common cause of joint failure in press systems.
- Confirm with the relevant inspector that press-fit is acceptable for the application before committing, and follow the manufacturer's installation requirements.
General protection for all materials
- Support pipe correctly to avoid stress at joints.
- Seal penetrations and fit a vapour barrier where condensation is likely.
- Insulate cold lines to stop moisture buildup on the surface.
Stainless steel is not automatically right for every water chemistry or environment, chloride levels and local conditions affect suitability, so assess the application and follow the supplier's technical requirements.
Step 7: Maintain, Inspect and Monitor for Long-Term Protection
Long-term protection comes down to routine. A simple maintenance schedule catches most problems while they are still cheap to fix.
| Frequency | Task | Purpose |
|---|---|---|
| Monthly | Visual check of accessible pipework | Spot staining, crust or weeping |
| Quarterly | Draw and check water appearance | Detect discolouration early |
| Annually | Water quality test | Track pH, hardness, chlorides |
| Annually | Inspect insulation and vapour barriers | Prevent moisture buildup |
| Every few years | Internal inspection of suspect sections | Confirm wall thickness |
Log every reading. Trends matter more than single results, and a rising chloride level or falling pH tells you to act before a leak does.
When to Call a Licensed Plumber or Water-Quality Professional
Call a licensed plumber for active leaks, repeated pinholes, or corrosion at a joint you cannot safely isolate.
Health and drinking-water implications are the reason not to delay. Metal and nickel leaching from corroding pipework can affect water quality, and that is a specialist assessment, not a DIY fix.
For material selection on commercial projects, Valtech Australia can supply 316L stainless steel press-fit pipe and fittings with WaterMark documentation for verification. Trade customers can register for trade pricing or request a commercial project quotation.
Corrosion rarely announces itself. It builds quietly until a joint weeps or a wall thins through.
Frequently Asked Questions
What causes corrosion inside water pipes?
Corrosion inside water pipes usually comes from a mix of water chemistry and material factors. Low or unstable pH, high dissolved oxygen, residual disinfectants, chloride and sulphate levels, and soft or aggressive water all increase the corrosion rate. Galvanic corrosion occurs where dissimilar metals meet, while crevice and pitting corrosion start at joints, fittings and scale deposits. Stagnation, high flow velocities and poor installation practice make each of these worse. Testing the water and inspecting the pipe material is the only reliable way to confirm which cause applies.
Can water quality affect plumbing corrosion?
Yes. Water quality and plumbing corrosion are directly linked. pH, alkalinity, hardness, dissolved oxygen, disinfectant residual and chloride concentration all influence how aggressive water is toward metal pipes. Aggressive water can thin copper walls, cause pitting and leave green corrosion products or blue-green staining. Water utilities adjust water chemistry for corrosion control, but conditions vary across supply zones and can change over time. Testing at the point of use, then matching pipe material to the results, is the practical way to manage the risk.
Does stainless steel prevent plumbing corrosion?
Stainless steel resists corrosion better than many common plumbing metals because of its passive oxide layer, but no material suits every water chemistry. Chloride concentration, stagnation, temperature and installation quality all affect performance. Valtech Australia supplies 316L stainless steel press-fit pipe and fittings using the M press profile, WaterMark certified under WM 75254, with a 25-year product warranty subject to warranty terms, correct installation and appropriate application. Assess the application conditions and follow Valtech's technical requirements before specifying it.
How can you tell if plumbing pipes are corroding?
Look for discoloured water at first draw, blue-green staining on fixtures, white crust around joints, green corrosion products on copper, reduced flow, pinhole leaks and visible wall-thickness loss at fittings. Damp patches, condensation that never dries and repeated leak repairs in the same area also point to corrosion. A licensed plumber can confirm with a physical inspection, and water testing helps identify whether aggressive water is driving the problem. Catching the signs early usually means a repair rather than a full replacement.