

How to Keep Press Tools Calibrated on Site
Last Updated: October 28, 2026
Quick Summary
Regular press tool calibration proves a tool still produces the press it was designed to produce, so every joint it makes is verified rather than assumed. Check the tool against a known reference with a test press, record the result, and send any out-of-tolerance tool to a service agent before it returns to live work.
- Inspect jaw faces for scoring, burrs and contamination before the first press each day.
- Run a weekly test press on an offcut and check jaw marks for full, even coverage.
- Set service intervals per tool, tracked by cycle count rather than calendar time.
- Record tool serial number, jaw set, sizes tested, result and the checker's name.
- Tag out failed tools, inspect joints pressed since the last passing check, then re-verify.
Table of Contents
- Why Press Tool Calibration Matters on Every Job
- What You'll Need Before You Start
- Step-by-Step Press Tool Calibration Workflow
- Plumbing Press Tool Service Intervals by Use and Conditions
- Signs of Press Tool Wear You Should Never Ignore
- Stainless Steel Press-Fit Installation Best Practices That Protect Accuracy
- Calibration Records, Audit Readiness and Corrective Action
- Book Your Press Tool Service and Stock Up on Valtech Fittings
- Frequently Asked Questions
Why Press Tool Calibration Matters on Every Job
A press tool that has drifted out of tolerance still looks fine, still sounds fine, and still closes its jaws. Press tool calibration checks a tool against a known reference so you can prove it produces the press it was designed to produce.
Valtech Australia supplies WaterMark certified 316L stainless steel press-fit pipe and fittings (WM 75254, M press profile) to plumbers and contractors.
What You'll Need Before You Start
Gather these before you touch the tool.
- The tool's operating manual and the manufacturer's stated service schedule
- The tool's calibration or service logbook
- A test press setup: offcut pipe and a test fitting of the correct size and profile
- The correct jaw or jaw set for the profile you are running
- Inspection gear: clean rag, torch, and a way to check jaw alignment
- Your project's pipe schedule, so you are testing the sizes you actually install
- A written record sheet or a digital asset log
Step-by-Step Press Tool Calibration Workflow
Calibration on site is a verification routine, not a rebuild: confirm the tool still performs, document it, and send anything that fails to a service agent.
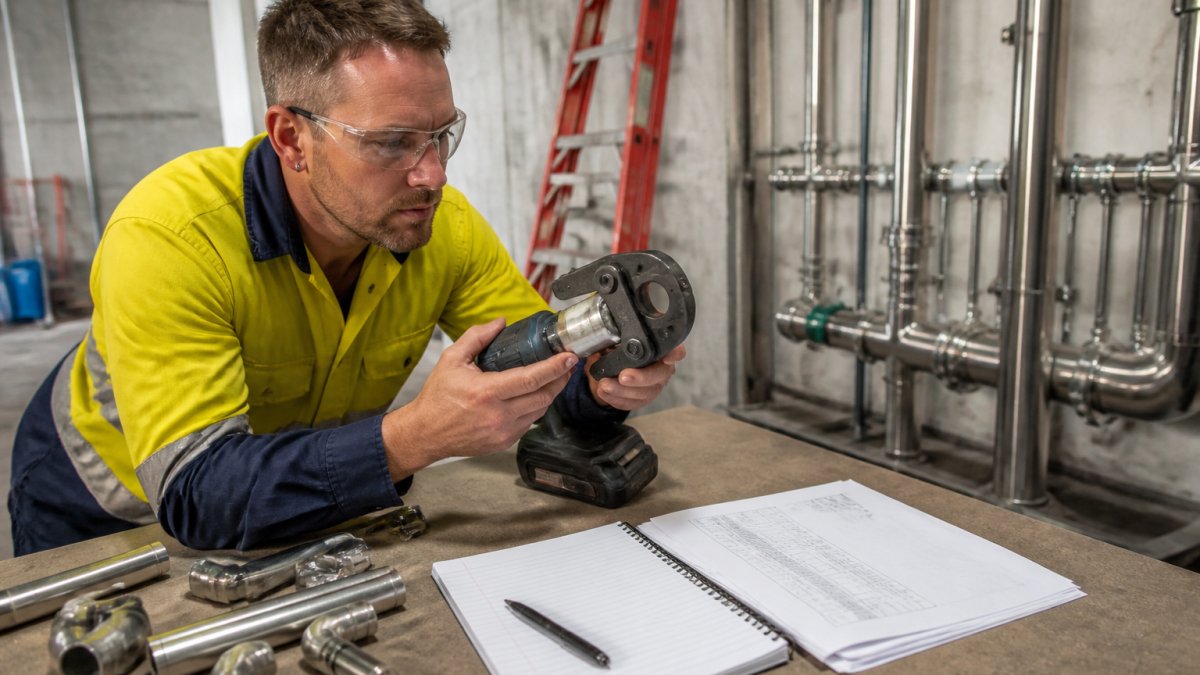
Step 1: Inspect the Tool and Consumables
- Check jaw faces for scoring, burrs and contamination
- Confirm the jaw closes squarely with no visible gap
- Inspect the tool body, battery contacts and trigger for damage
- Check the jaw set matches the pipe profile you are installing
- Confirm the tool's service date is current
Step 2: Verify Performance with a Test Press
- Assemble a test joint using the correct pipe and fitting for the size being checked
- Run a full press cycle and let the tool complete it
- Inspect the pressed profile for full, even jaw marks around the circumference
- Check for distortion, cracking or an incomplete press
- Repeat across each size and jaw set in use on the job
Step 3: Record Results and Escalate Out-of-Tolerance Tools
Record the date, tool serial number, jaw set, sizes tested, result and the name of the person who checked it. If a tool fails, tag it out, remove it from site, and send it to a service agent for professional calibration, logging the corrective action and return date.
Plumbing Press Tool Service Intervals by Use and Conditions
There is no single interval that fits every contractor. Plumbing press tool service intervals depend on workload, environment and how hard the tool is worked, with the manufacturer's recommendations as the baseline. Press tools wear on cycle count and jaw condition far more than calendar time, so a tool that sits in a van for six months is not equivalent to one that has run thousands of cycles on a plant-room fit-out.
What actually drives press tool wear
- Cycle count. Every full press cycle loads the jaw, the ram and (on hydraulic models) the pump and seals. Cycle count is the most reliable wear indicator, which is why a per-tool cycle log beats a calendar reminder.
- Jaw condition. Jaw faces take the direct load. Scoring, burrs, contamination and misalignment accelerate wear on the tool body and produce out-of-tolerance presses before the tool itself fails.
- Hydraulic behaviour. On hydraulic models, seal and fluid condition affect whether the tool reaches full press force. A tool that feels soft is often a hydraulic symptom, not a battery symptom.
- Environment. Dust, grit, moisture and corrosive site conditions contaminate jaws and mechanisms; coastal and industrial sites warrant closer inspection.
- Handling history. Dropped tools, tools shared across crews, and tools with prior repairs all warrant shorter intervals.
A contractor framework for setting intervals
| Usage Pattern | Typical Interval Guidance | What Drives It |
|---|---|---|
| Light, occasional use | Manufacturer's standard interval | Low cycle count, clean indoor work |
| Regular daily installation | Shorter interval, tracked by cycle count | High press volume, wear on jaws |
| High-volume commercial | Shorter again, with interim field checks | Continuous cycles, heat and dust |
| Harsh or dusty sites | Shorten and inspect more often | Contamination, jaw wear |
| Shared or fleet tools | Track per tool, not per crew | Unknown handling history |
Interim field checks between services
- Daily jaw inspection, check faces for scoring, burrs and contamination before the first press.
- Weekly test press, run a test press on an offcut and inspect jaw marks for full, even coverage around the circumference.
- Cycle-count review, compare the tool's cycle counter (where fitted) or the crew's press log against the interval you set.
- Symptom check, soft or slow cycles, incomplete cycles, unusual noise and faster battery drain are prompts to inspect, not to swap batteries and carry on.
Factors that should shorten the interval
- High daily press counts
- Dusty, wet or corrosive site conditions
- Tools that get dropped or knocked around
- Multiple crews sharing one tool
- A tool that has already been repaired once
- A tool returning from a service agent, verify with a test press before returning it to live work
What to do when the interval is reached
For the product side of the system, the Valtech technical information sets out the official technical requirements for Valtech 316L press-fit products, and those are the requirements to work from when confirming jaw and profile compatibility.
Signs of Press Tool Wear You Should Never Ignore
- Press cycles that feel softer or slower than they used to
- The tool failing to complete a cycle
- Visible jaw damage, chipping or misalignment
- Uneven or shallow jaw marks on a pressed fitting
- Battery draining faster than normal
- Unusual noises or a change in the sound of the press
- Leaking hydraulic fluid on hydraulic models
Stainless Steel Press-Fit Installation Best Practices That Protect Accuracy
- Cut pipe square and deburr fully before assembly
- Mark the insertion depth and confirm the pipe is fully seated
- Keep fittings in original packaging until use to avoid contamination
- Use the correct jaw and profile for the fitting, every time
- Do not mix components from different systems
- Complete the full press cycle and never stop mid-press
- Keep the tool and jaws clean between presses
Stainless steel is not automatically suitable for every water chemistry or environment (pubmed.ncbi.nlm.nih.gov). Where chlorine, chloride exposure or water quality could affect suitability, application conditions should be assessed and Valtech's technical requirements followed.
Calibration Records, Audit Readiness and Corrective Action
Records are the part most contractors skip, and the part that saves them when a question is asked six months later. A calibration record is evidence: it shows the tool was checked, when, by whom, and what the result was. On commercial projects, that evidence is increasingly reviewed as part of quality assurance, and a clean record trail is often the difference between a straightforward sign-off and a long conversation about a joint nobody can verify.
What a calibration record should capture
For audit readiness, each record should capture:
- Tool make, model and serial number
- Jaw set and sizes tested
- Date of check and the person who performed it
- Test press result (pass or fail)
- Cycle count at the time of check (where the tool records it)
- Service agent details and return date for any failed tool
- Corrective action taken and the date the tool returned to service
How records support quality assurance and client requirements
A common pattern is a per-tool asset log (digital or paper) that travels with the tool, plus a project-level summary listing which tools were used on which scope, so a question about a particular riser or plant room can be traced back to the tools and their calibration status at the time.
Out-of-tolerance tools: the corrective-action workflow
- Tag out and remove. Tag the tool clearly, remove it from site, and do not let it return to live work until it has been serviced and re-verified.
- Assess work completed since the last valid calibration. Identify the joints pressed with that tool since its last passing check. This is where a per-tool log earns its keep, without it, the assessment scope is guesswork.
- Inspect the affected joints. Check pressed profiles for full, even jaw marks, distortion, cracking or incomplete presses. Where a joint is suspect, follow the manufacturer's technical requirements for assessment and remediation.
- Arrange repair or recalibration. Send the tool to a service agent for professional calibration and any required repair.
- Re-verify before return to service. Run a test press across each size and jaw set in use, confirm the result, and record it.
- Close the loop. Log the corrective action, the return date and the re-verification result, and reset the service interval from the return-to-service date.
Keeping records audit-ready across a large project
Large projects run a wide spread of stainless components, and tracking tool condition across that scope is easier when you understand the stainless steel components used on large construction projects. Pair that with a simple rule: every tool has a log, every log has a next-due date, and every failed tool has a closed corrective-action entry. That routine is what makes a calibration history defensible when a client, consultant or quality auditor asks for it.
Book Your Press Tool Service and Stock Up on Valtech Fittings
Valtech Australia supplies a WaterMark certified 316L stainless steel press-fit system (WM 75254, M press profile) and offers a 25-year product warranty subject to the warranty terms, correct installation and appropriate application. You can register for trade pricing.
Get started with Valtech Australia.
Frequently Asked Questions
How often should plumbing press tools be serviced or calibrated?
There is no single interval that suits every tool. Base your schedule on the tool manufacturer's recommendations, how many presses you complete each week, the material and size range you press, and site conditions such as dust and moisture. A practical approach is a daily visual check, a periodic field verification against a test press or gauge, and a full professional service at the interval your manufacturer specifies. High-volume commercial crews should shorten that cycle, while low-use residential tools can usually follow the standard recommendation. Keep a log so the interval is based on evidence, not guesswork.
What happens to a press joint if the tool loses calibration?
A tool that is out of tolerance may not deliver the full, consistent force the fitting requires. The result can be an incomplete press that looks finished but fails a pressure test, or a joint that passes initially and leaks later. On stainless steel press-fit systems, the cost of rework, downtime and reputational damage far outweighs the cost of routine calibration. If you suspect a tool has lost calibration, quarantine it, inspect every joint made since the last verified check, and follow your corrective action procedure before returning it to service.
Does an uncalibrated tool affect WaterMark compliance?
The Valtech system is WaterMark certified under WM 75254.
How do I know if my press tool requires professional calibration?
Watch for signs of press tool wear: longer press cycle times, unusual noises, hydraulic fluid leaks, damaged or misaligned jaws, incomplete press profiles, or a tool that feels different in your hand. A failed field verification, such as a test press that does not meet the specified profile, is a clear trigger. So is a tool that has been dropped, used outside its stated range, or reached the manufacturer's recommended service interval. When any of these occur, stop using the tool and book a professional calibration rather than adjusting it yourself.
